Showing posts with label Food. Show all posts

Friday, May 15, 2026

texas size

 While in Texas last May 2025 for our granddaughter's high school graduation we found this shop where they make the most delicious croissants. 


They even had Texas sized French Croissants.


I hope we can make it back to this place when we visit Texas again, my mouth is just watering looking at these photos.

I found some photos on my Nikon camera that I had taken on our trip, and I totally forgot about them, these are a few of them.

Wednesday, March 05, 2025

still making sourdough

I am obsessed with making sourdough, so hopefully this is the last post I'll be doing...LOL.

I fed my sourdough one morning and before I knew it, it was overflowing.


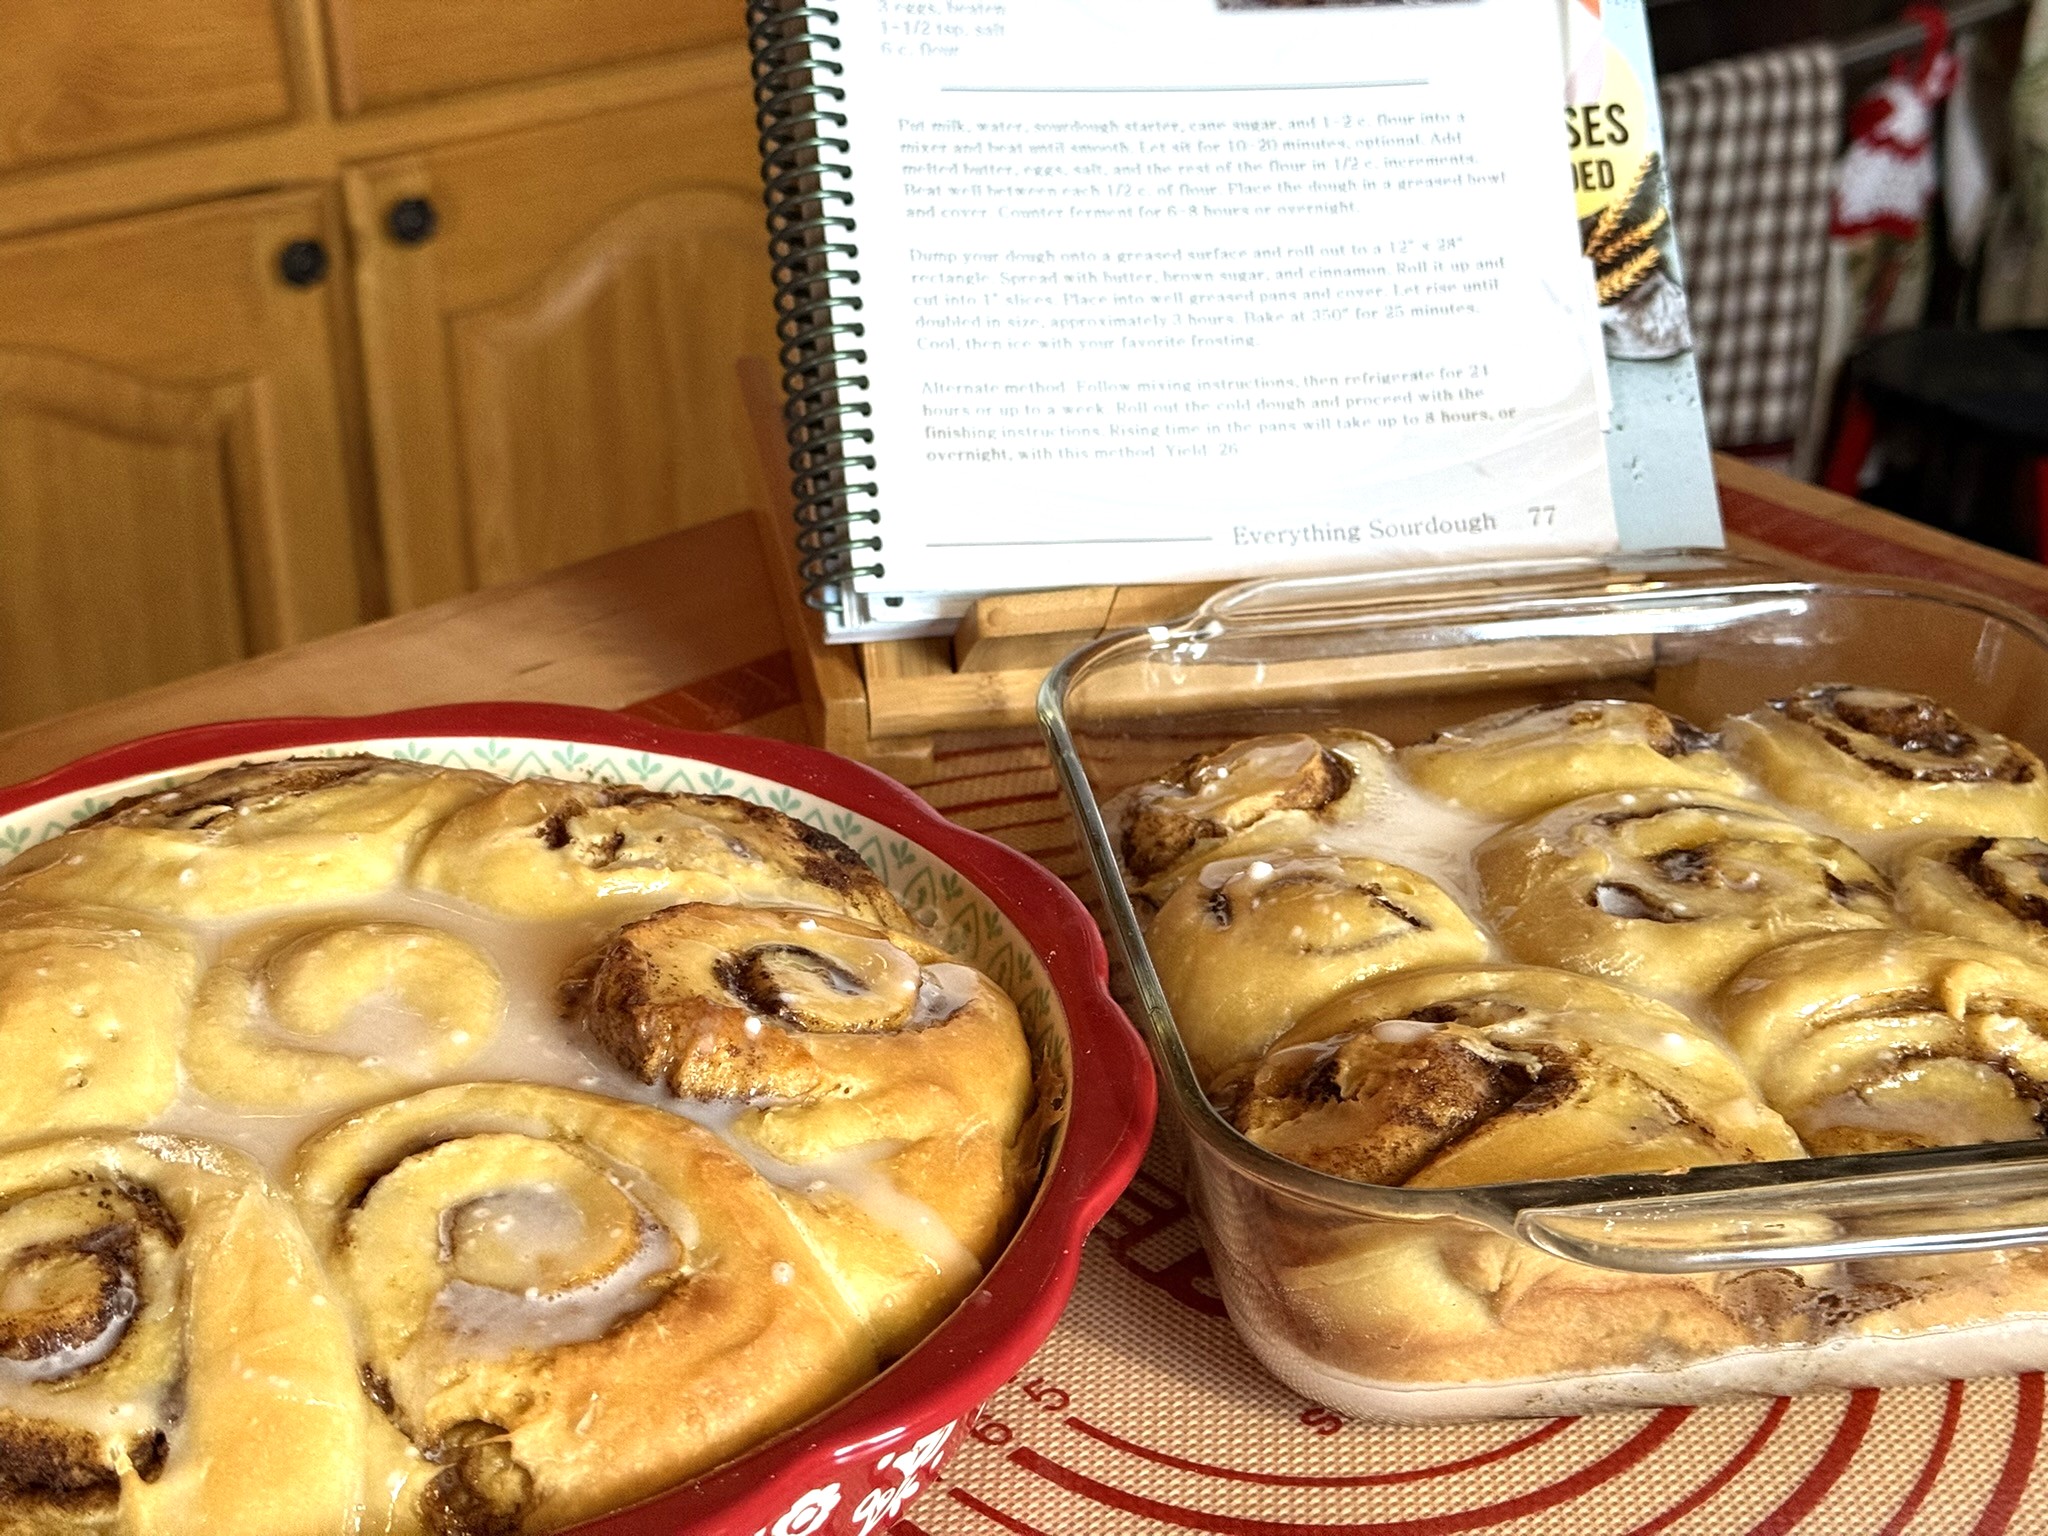
I totally enjoy making anything from the sourdough starter, bread, cinnamon rolls, stromboli and even sourdough pancakes.  My favorite sourdough book is Everything Sourdough by Charlene Yoder.


The sourdough discard pancakes are from Mary's Nest. Click her name and it takes you to her website, scroll down and you'll find the recipe.

My sourdough journey has changed totally with the book Everything Sourdough cookbook, if interested the link is at the beginning of this post.

Let me know if you decide to make your own or if you already have sourdough starter waiting to be used to make wonderful goodies.

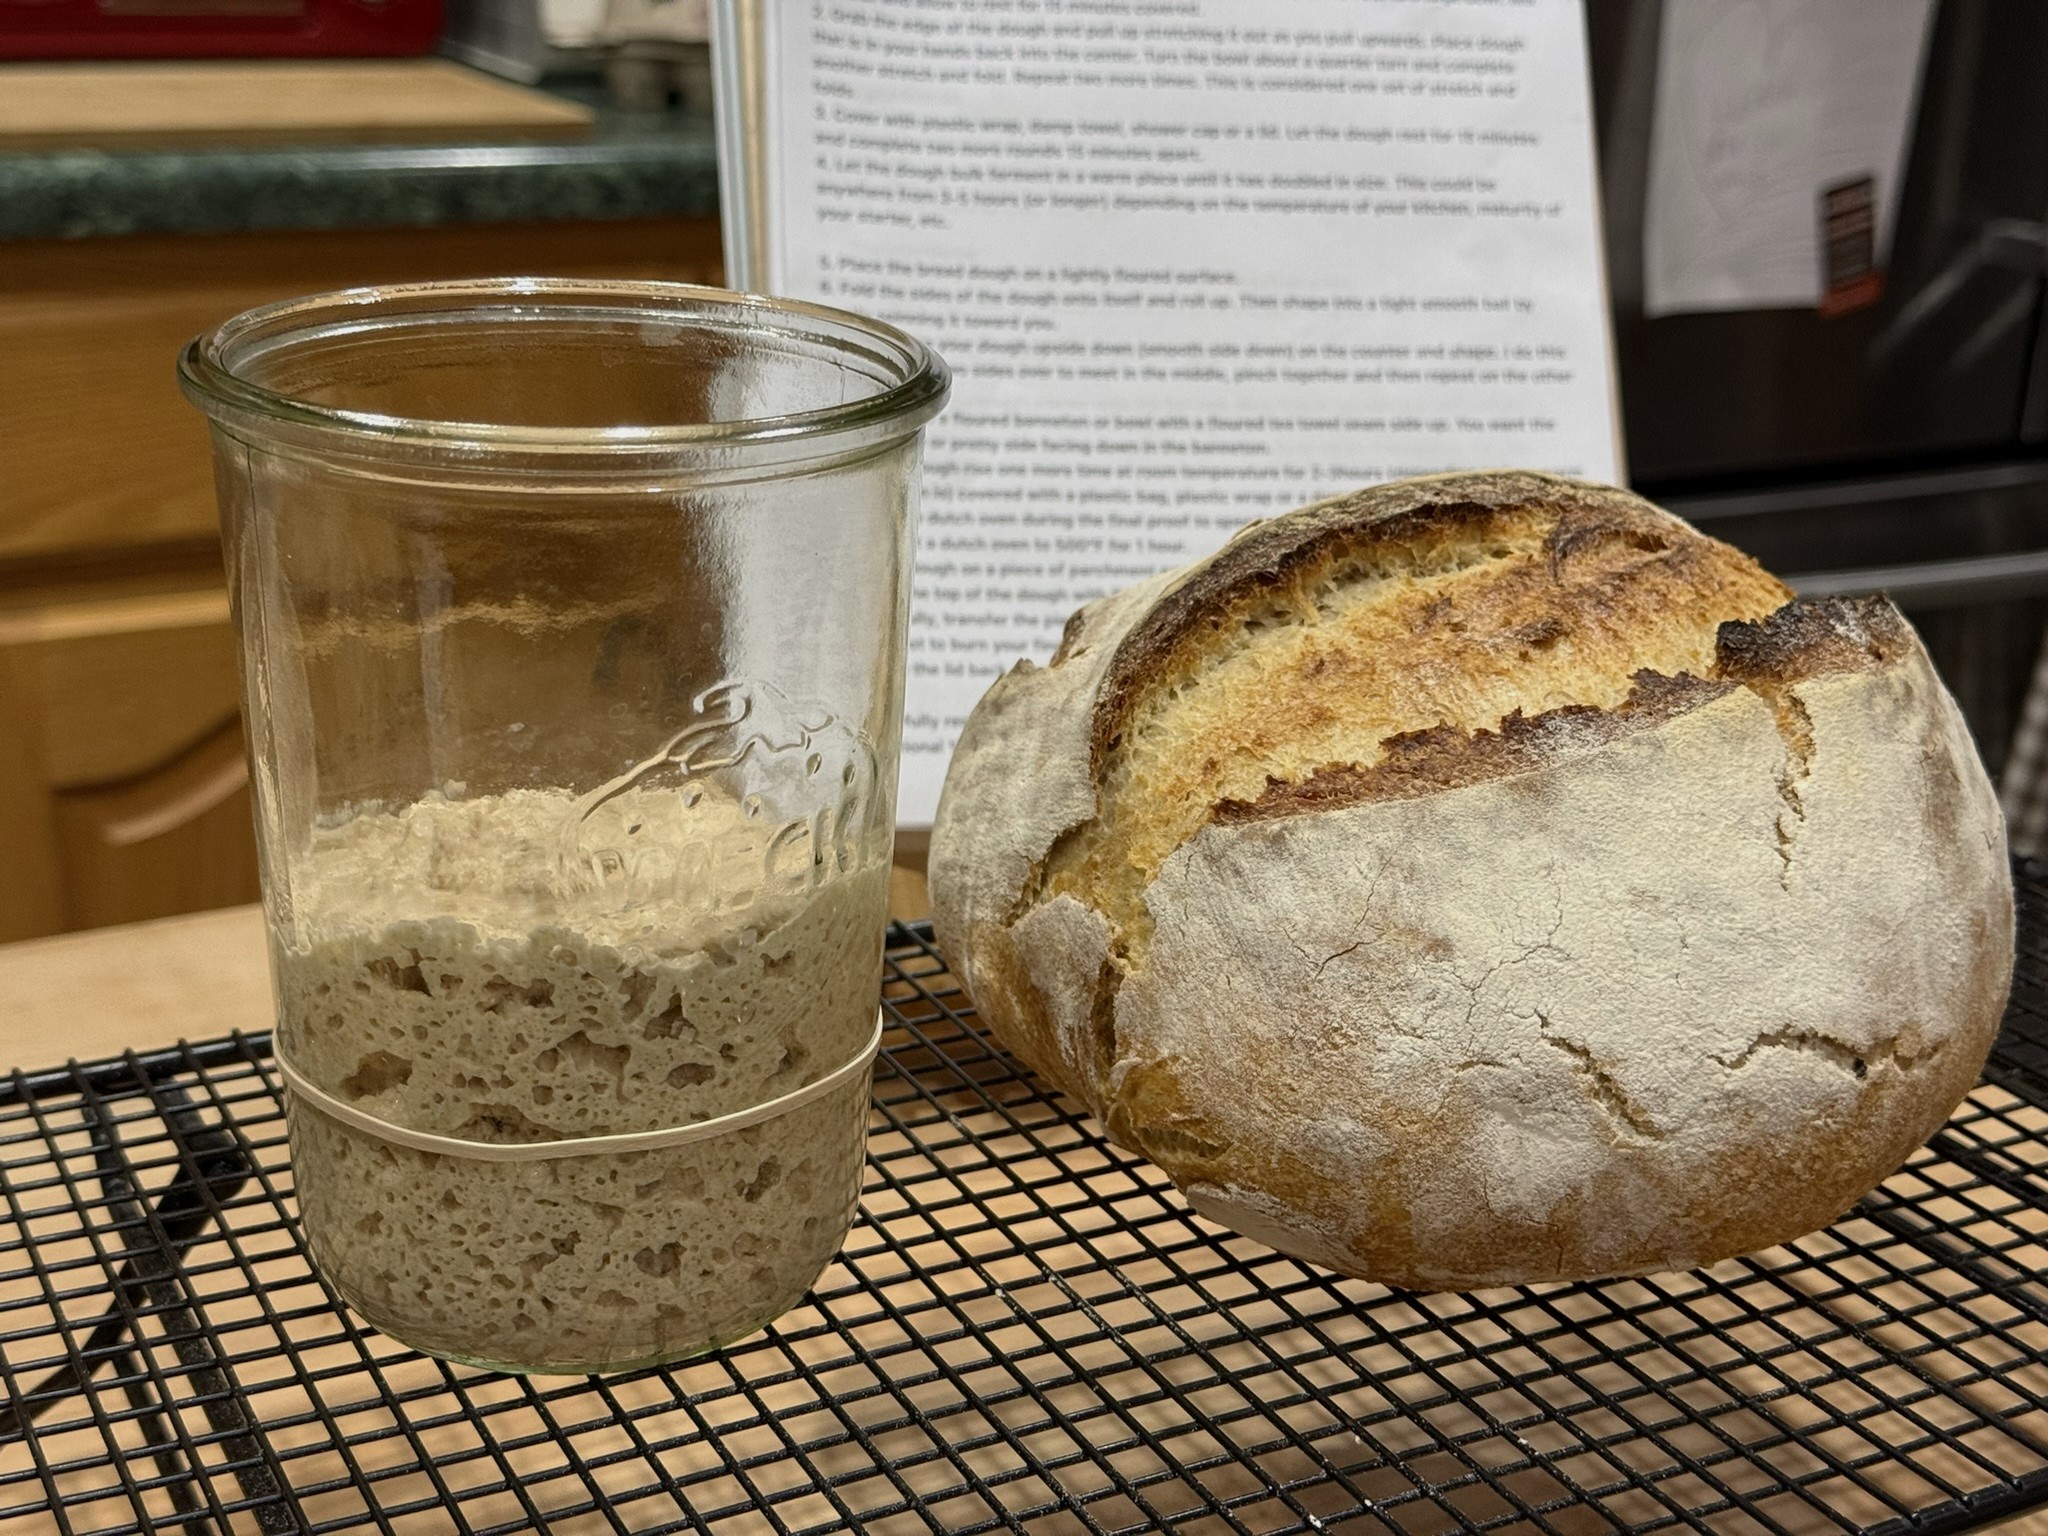
This is a recipe that I have used often, and you can find it on Chloe' Avalon YouTube channel and it's at the bottom of this post.  I have found that this storage container actually works wonderful in rising my dough.  One of the recipes that I use which is in the Everything Sourdough cookbook has you rising the dough in the fridge and this works great, I actually find that my bread is not as heavy as it used to be.  I also use the float test when I am checking to see if my sourdough starter has proofed enough.  If I rise my dough overnight on the counter this container works wonderful.  I also use this recipe from the Prairie Homestead Jill Winger.


I had already made this post to be posted when Mary from Windy Meadows Farm asked me for some tips.  I hope this will help.  I have tried so many different recipes and these recipes have worked well for me but what I really think made the difference was making sure my sourdough was proofed enough and the container I do my first rise in.  All the links are in italic lettering if you want to check things out.  I can't say enough about the Everything Sourdough cookbook, it was worth the price.

I feel like I'm turning into a food blogger (LOL) but I'm not.


Same Day Sourdough Bread 

Chloe' Avalon YouTube Channel

• 4½ cups, all purpose, organic white flour • 3/4 cup active sourdough starter • 1 1/2 cups of warm water • 2 heaping teaspoons sea salt Instructions 1. First thing in the morning, add warm water, active starter, salt, and flour to a large bowl. Mix together and allow to rest for 15 minutes covered. 2. Grab the edge of the dough and pull up stretching it out as you pull upwards. Place dough that is in your hands back into the center. Turn the bowl about a quarter turn and complete another stretch and fold. Repeat two more times. This is considered one set of stretch and folds. 3. Cover with plastic wrap, damp towel, shower cap or a lid. Let the dough rest for 15 minutes and complete two more rounds 15 minutes apart. 4. Let the dough bulk ferment in a warm place until it has doubled in size. This could be anywhere from 3-5 hours (or longer) depending on the temperature of your kitchen, maturity of your starter, etc. 5. Place the bread dough on a lightly floured surface. 6. Fold the sides of the dough onto itself and roll up. Then shape into a tight smooth ball by gently spinning it toward you. 7. Then, place your dough upside down (smooth side down) on the counter and shape. I do this by folding the two sides over to meet in the middle, pinch together and then repeat on the other two sides. 8. Transfer to a floured banneton or bowl with a floured tea towel seam side up. You want the smooth side or pretty side facing down in the banneton. 9. Let the dough rise one more time at room temperature for 2-3hours (depending on how warm your kitchen is) covered with a plastic bag, plastic wrap or a damp kitchen towel. Preheat the Dutch oven during the final proof to speed up the process. 10. Preheat a Dutch oven to 500°F for 1 hour. 11. Place dough on a piece of parchment paper. 12. Dust the top of the dough with flour, if desired, and score with lame or razor blade. 13. Carefully, transfer the piece of parchment paper with the dough into the hot Dutch oven. Careful not to burn your fingers. 14. Place the lid back on and place the Dutch oven into the hot oven. Bake for 20 minutes @ 485° 15. Carefully remove the lid with oven mitts, turn the oven temperature down to 475°F, and bake an additional 15-25 minutes or until golden brown. 

Thursday, January 30, 2025

lots of good bacteria

Before getting our milk cow I had started making sourdough starter.  This particular starter has been going since December of 2019.  It's taken on many forms over the past few years.  I've experimented with different types of flours to feed it with, and I always go back to our fresh ground wheat flour.  I used to keep a lot of starter but now I only keep enough starter to make a recipe with.  This starter has so many bubbles and this particular starter I put in the refrigerator to use in my next recipe.  Putting it in the refrigerator will slow down the fermentation.


I've been wanting to make homemade mayonnaise and finally did.  Unlike most recipes this mayonnaise is fermented and will sit on the counter for 6-10 hours after which I will put in the fridge where it will last for 2+ months.  If you click on the italic pink colored words that is a link for the recipe and will be in all my posts, just an FYI.


Also, since having a milk cow we make yogurt and with the whey that we drain out of the yogurt I used a bit in the mayo I made.  We also make our own culture and haven't bought any to make our yogurt.  You can use plain yogurt or buy the cultures from folks who sell it.  It took us a few tries to get it right and we have been off to the races with making our own culture and yogurt.


From our apples we also make Apple Cider Vinegar, and there is nothing like homemade ACV.


With all the culture growing in our home we have a lot of good live cultures that are helping with our gut health.  Sourdough also helps with gut health and digestion.
Since we are getting closer to retirement and are fairly in good health so far, no medications taken by either of us, I am working hard to keep it that way.  But raising and making our own food has really saved money for us.  I hardly go to the grocery store; I do buy from the Amish store near us where I get my spices and buy my flour in bulk.  I don't use much sugar in recipes and have changed up old reliable recipes where I either cut down on sugar amounts or eliminated it all together and believe it or not apple pie is actually very sweet when no sugar is added.


I am amazed at how good food really is especially when you cut out sugar like in this apple pie above.  The apple flavor came through and these are apples we have stored from our purchase at the apple orchard late this past fall, they were second apples and half price.  The crust was made from the Leaf Lard that I had rendered down.  Jim actually said it was the best pie crust he has ever eaten.
This is what's been happening on our farm and in our life, trying to enjoy the life we have and trying to stay somewhat healthy as we go.

Life is just so good when you keep it simple.

Tuesday, January 28, 2025

making lard

The start of 2025 has been a busy one.  We butchered our pigs that we were raising, with the lard we took the leaf lard and rendered it down.


Our final result was 18 quarts of really good lard that I use for pie crust, biscuits or any kind of pastry.  I've always wanted to render the leaf lard separately, instead of mixing and rendering all the lard together and I totally love the results.

Wednesday, July 03, 2024

blackcap jam

Hubby went out and foraged for black raspberries that grow wild on our land, or what locals call blackcaps.  We ended up with about 16 cups of berries from two pickings.


We made blackcap jam using no pectin, and it turned out delicious.  This recipe we found here.  We did water bath the jam for 5 minutes.  We also had 8 cups of berries and added 4 cups of sugar and it really was all you needed.  

The jam tasted so good on homemade bread.

Wednesday, May 01, 2024

chit-chat

On Sunday we took a drive and happened to drive by the eagle's nest that I posted about a few posts back.  There was one eagle, not sure if it was the male or female guarding the nest.  I was driving and stopped and opened the window to take a few photos, and I could hear it warning me to back off.

Life living in a pretty rural area is wonderful, but there is one drawback for me and that is pizza. I do miss my pizza, or I should say a good pizza. So, years ago I decided to fix that and started making my own.  Now I have the best of both worlds :)


After all our company that we had in March when sugaring was going on left, our pup was totally exhausted, and I'd say depressed.  She had so much attention and basically ran the whole time they were all here.  I think it was a few days before she was herself again.  Poor Suuvi, she was left with two "old" folks all the young ones left her (LOL).


Well, I'm off to do chores, I hope you all have a wonderful day!